
Managing Message Templates
Introduction
WhatsApp message templates allow you to use existing and pre-approved templates to send structured messages to customers who have opted to receive notifications. Messages can include appointment reminders, shipping information, issue resolution or payment updates.
You can create multiple templates in different categories:
- Marketing — Enables you to achieve a wide range of goals, from generating awareness to driving sales and retargeting customers. Examples include new product, service, or feature announcements, targeted promotions/offers, and cart abandonment reminders.
- Utility — Enables you to follow-up on user actions or requests. Examples include opt-in confirmation, order/delivery management (e.g., delivery update); account updates or alerts (e.g., payment reminder); or feedback surveys.
- Authentication — Enables you authenticate users with one-time passcodes, potentially at multiple steps in the login process (e.g., account verification, account recovery, integrity challenges).
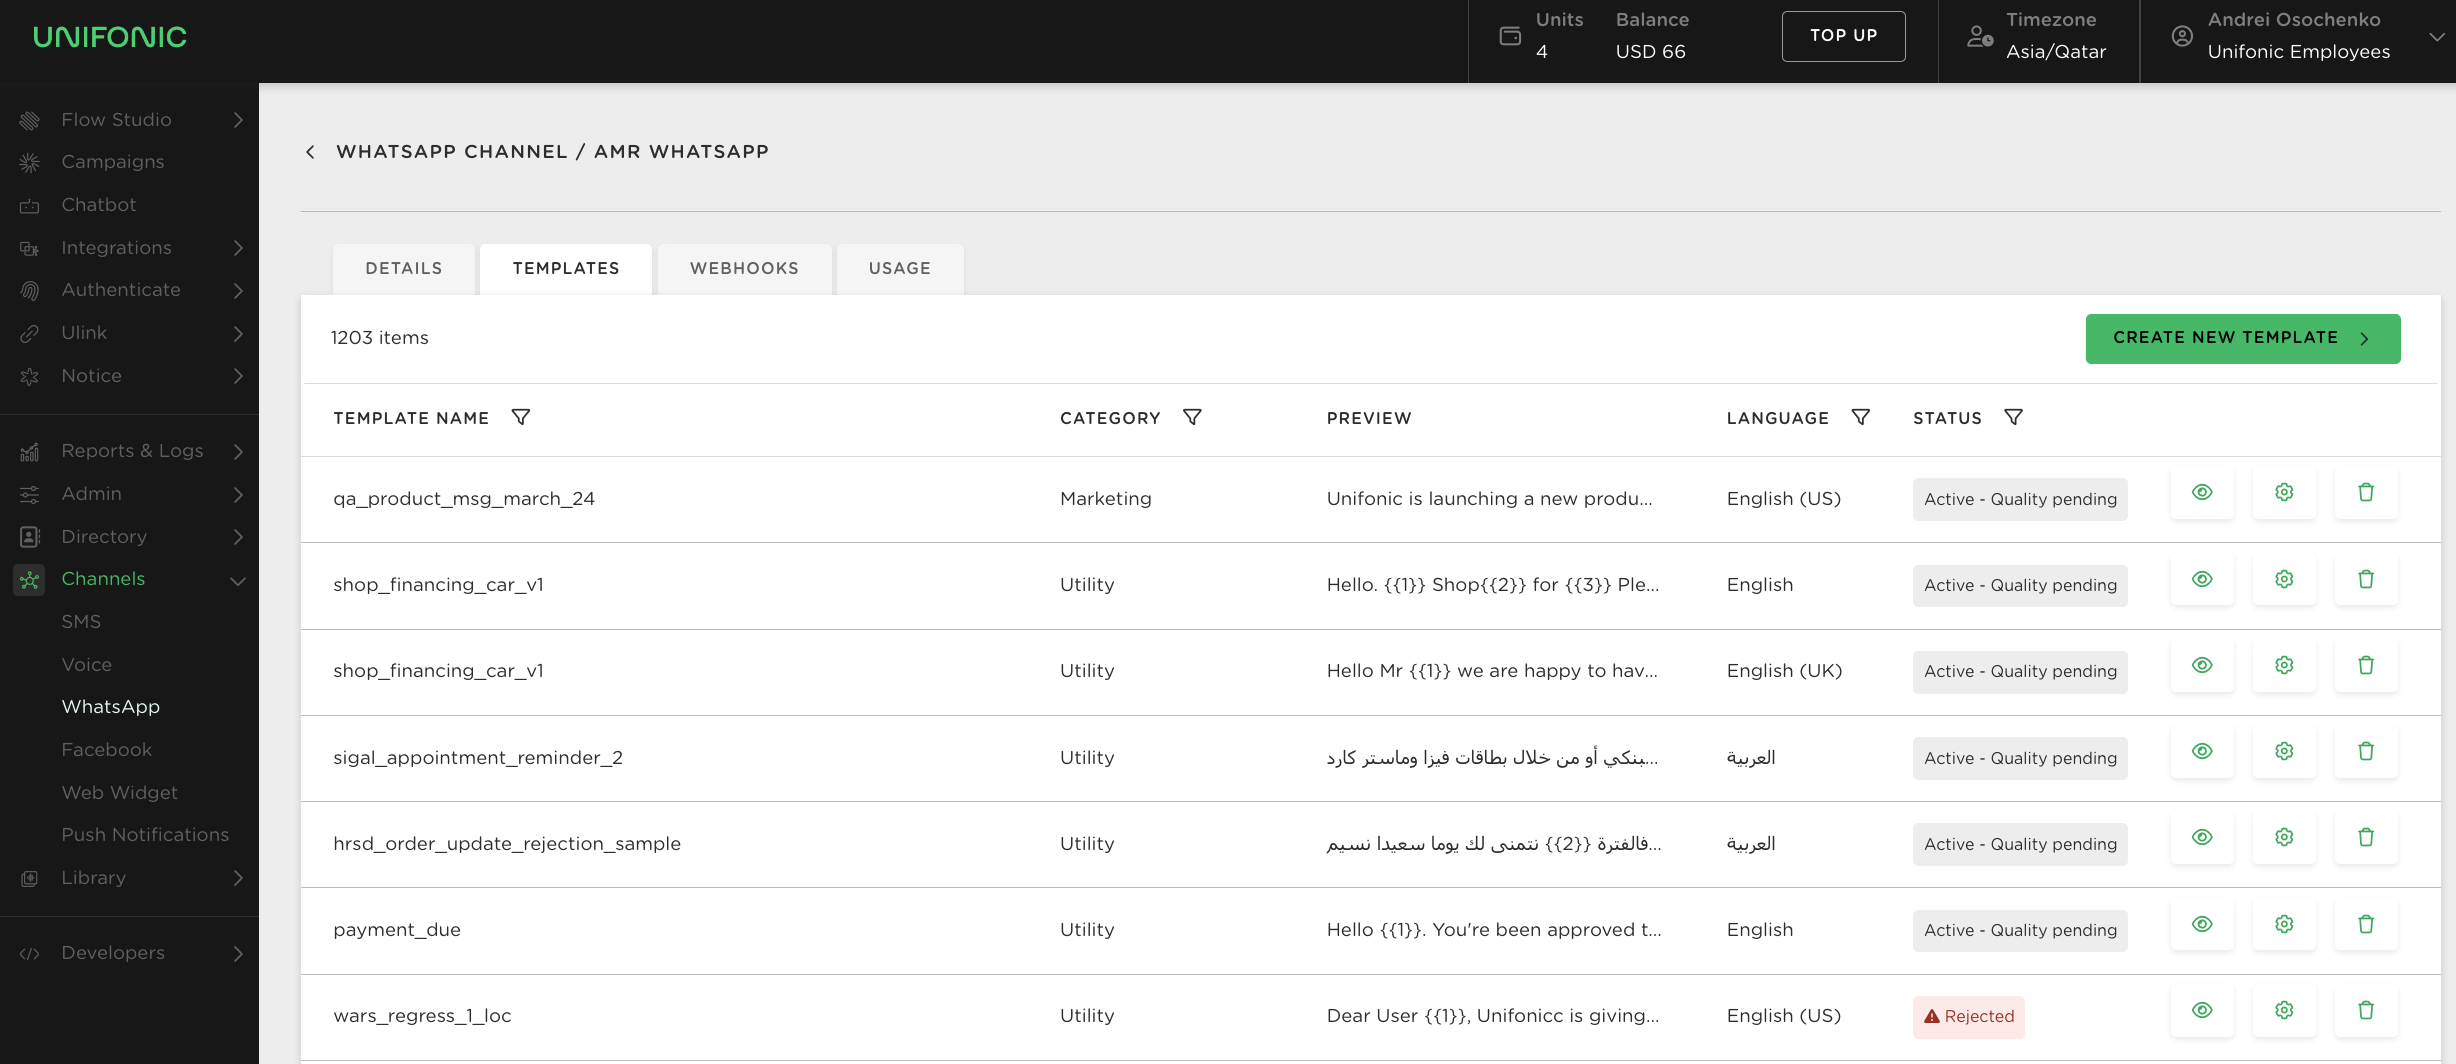
Managing templates on the Unifonic platform
Creating a message template on the Unifonic platform for WhatsApp Business is straightforward. Here's a user guide to navigate through the sections shown in the screenshots. Click Create New Template button to start creating a message template.
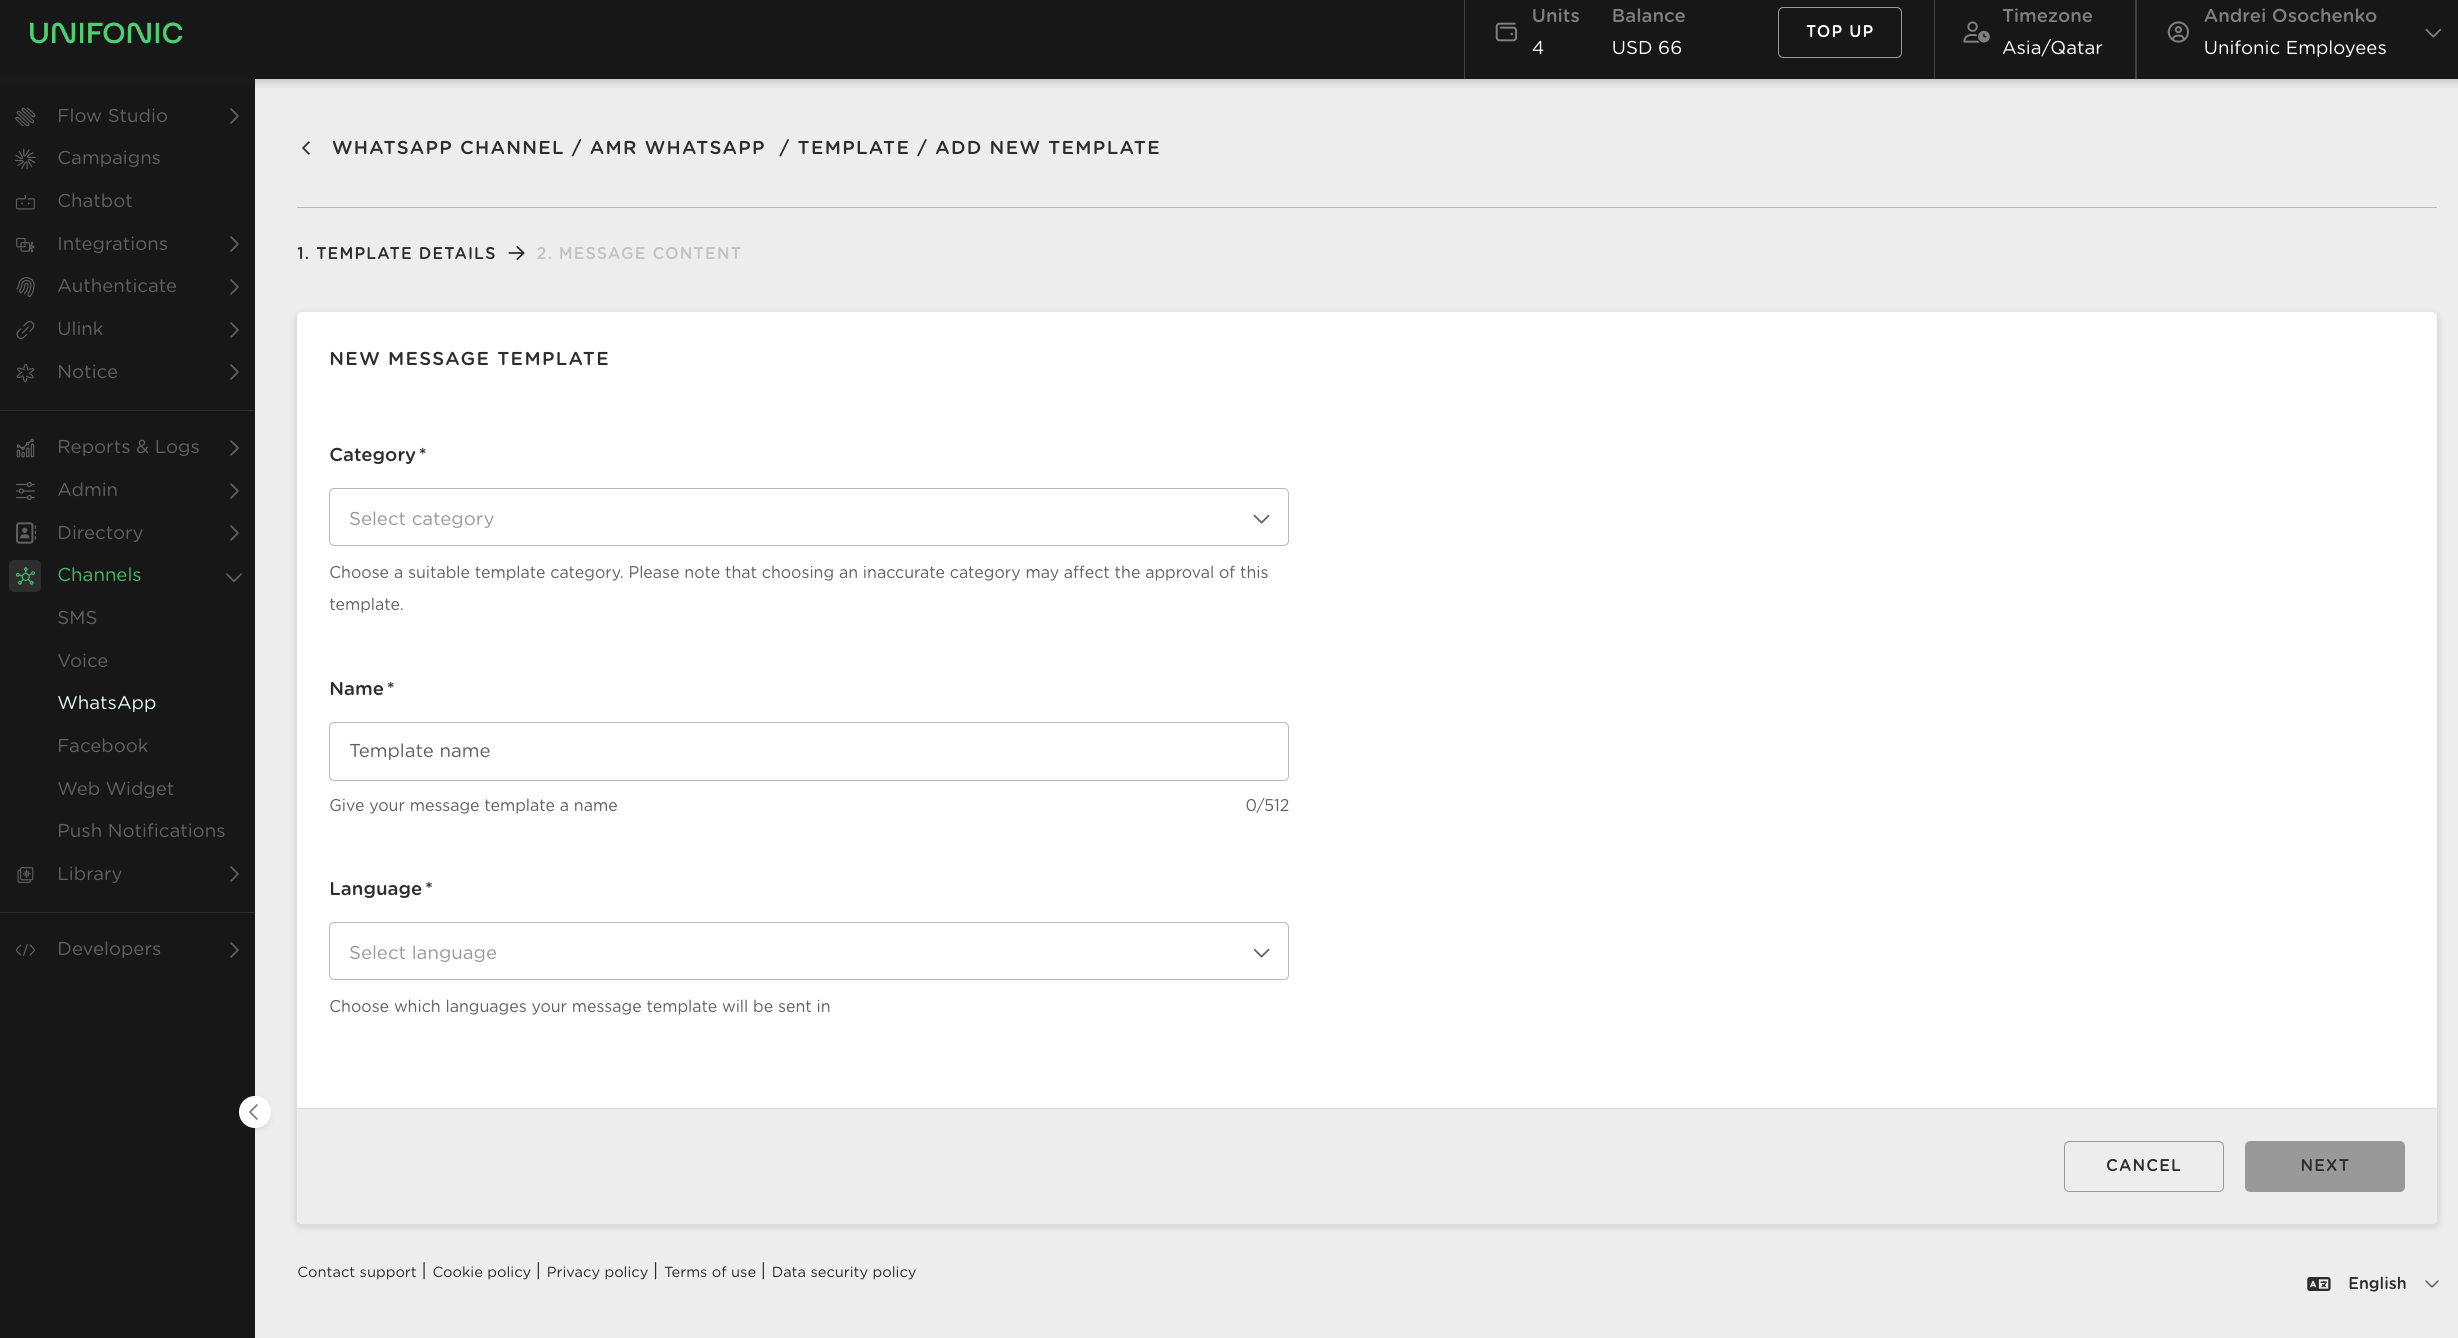
In the window opened after clicking the button please fill-in the following information.
-
Category:
- Click on the "Select category" dropdown menu to choose a suitable template category. It's important to select the category that best represents the purpose of your message, as this can affect the approval of the template.
-
Name:
- Enter a name for your message template in the "Name" field. This name should be descriptive of the template's purpose to easily identify it later.
-
Language:
- Use the "Select language" dropdown to choose the language(s) in which your message template will be sent. This should match the language of your recipients.
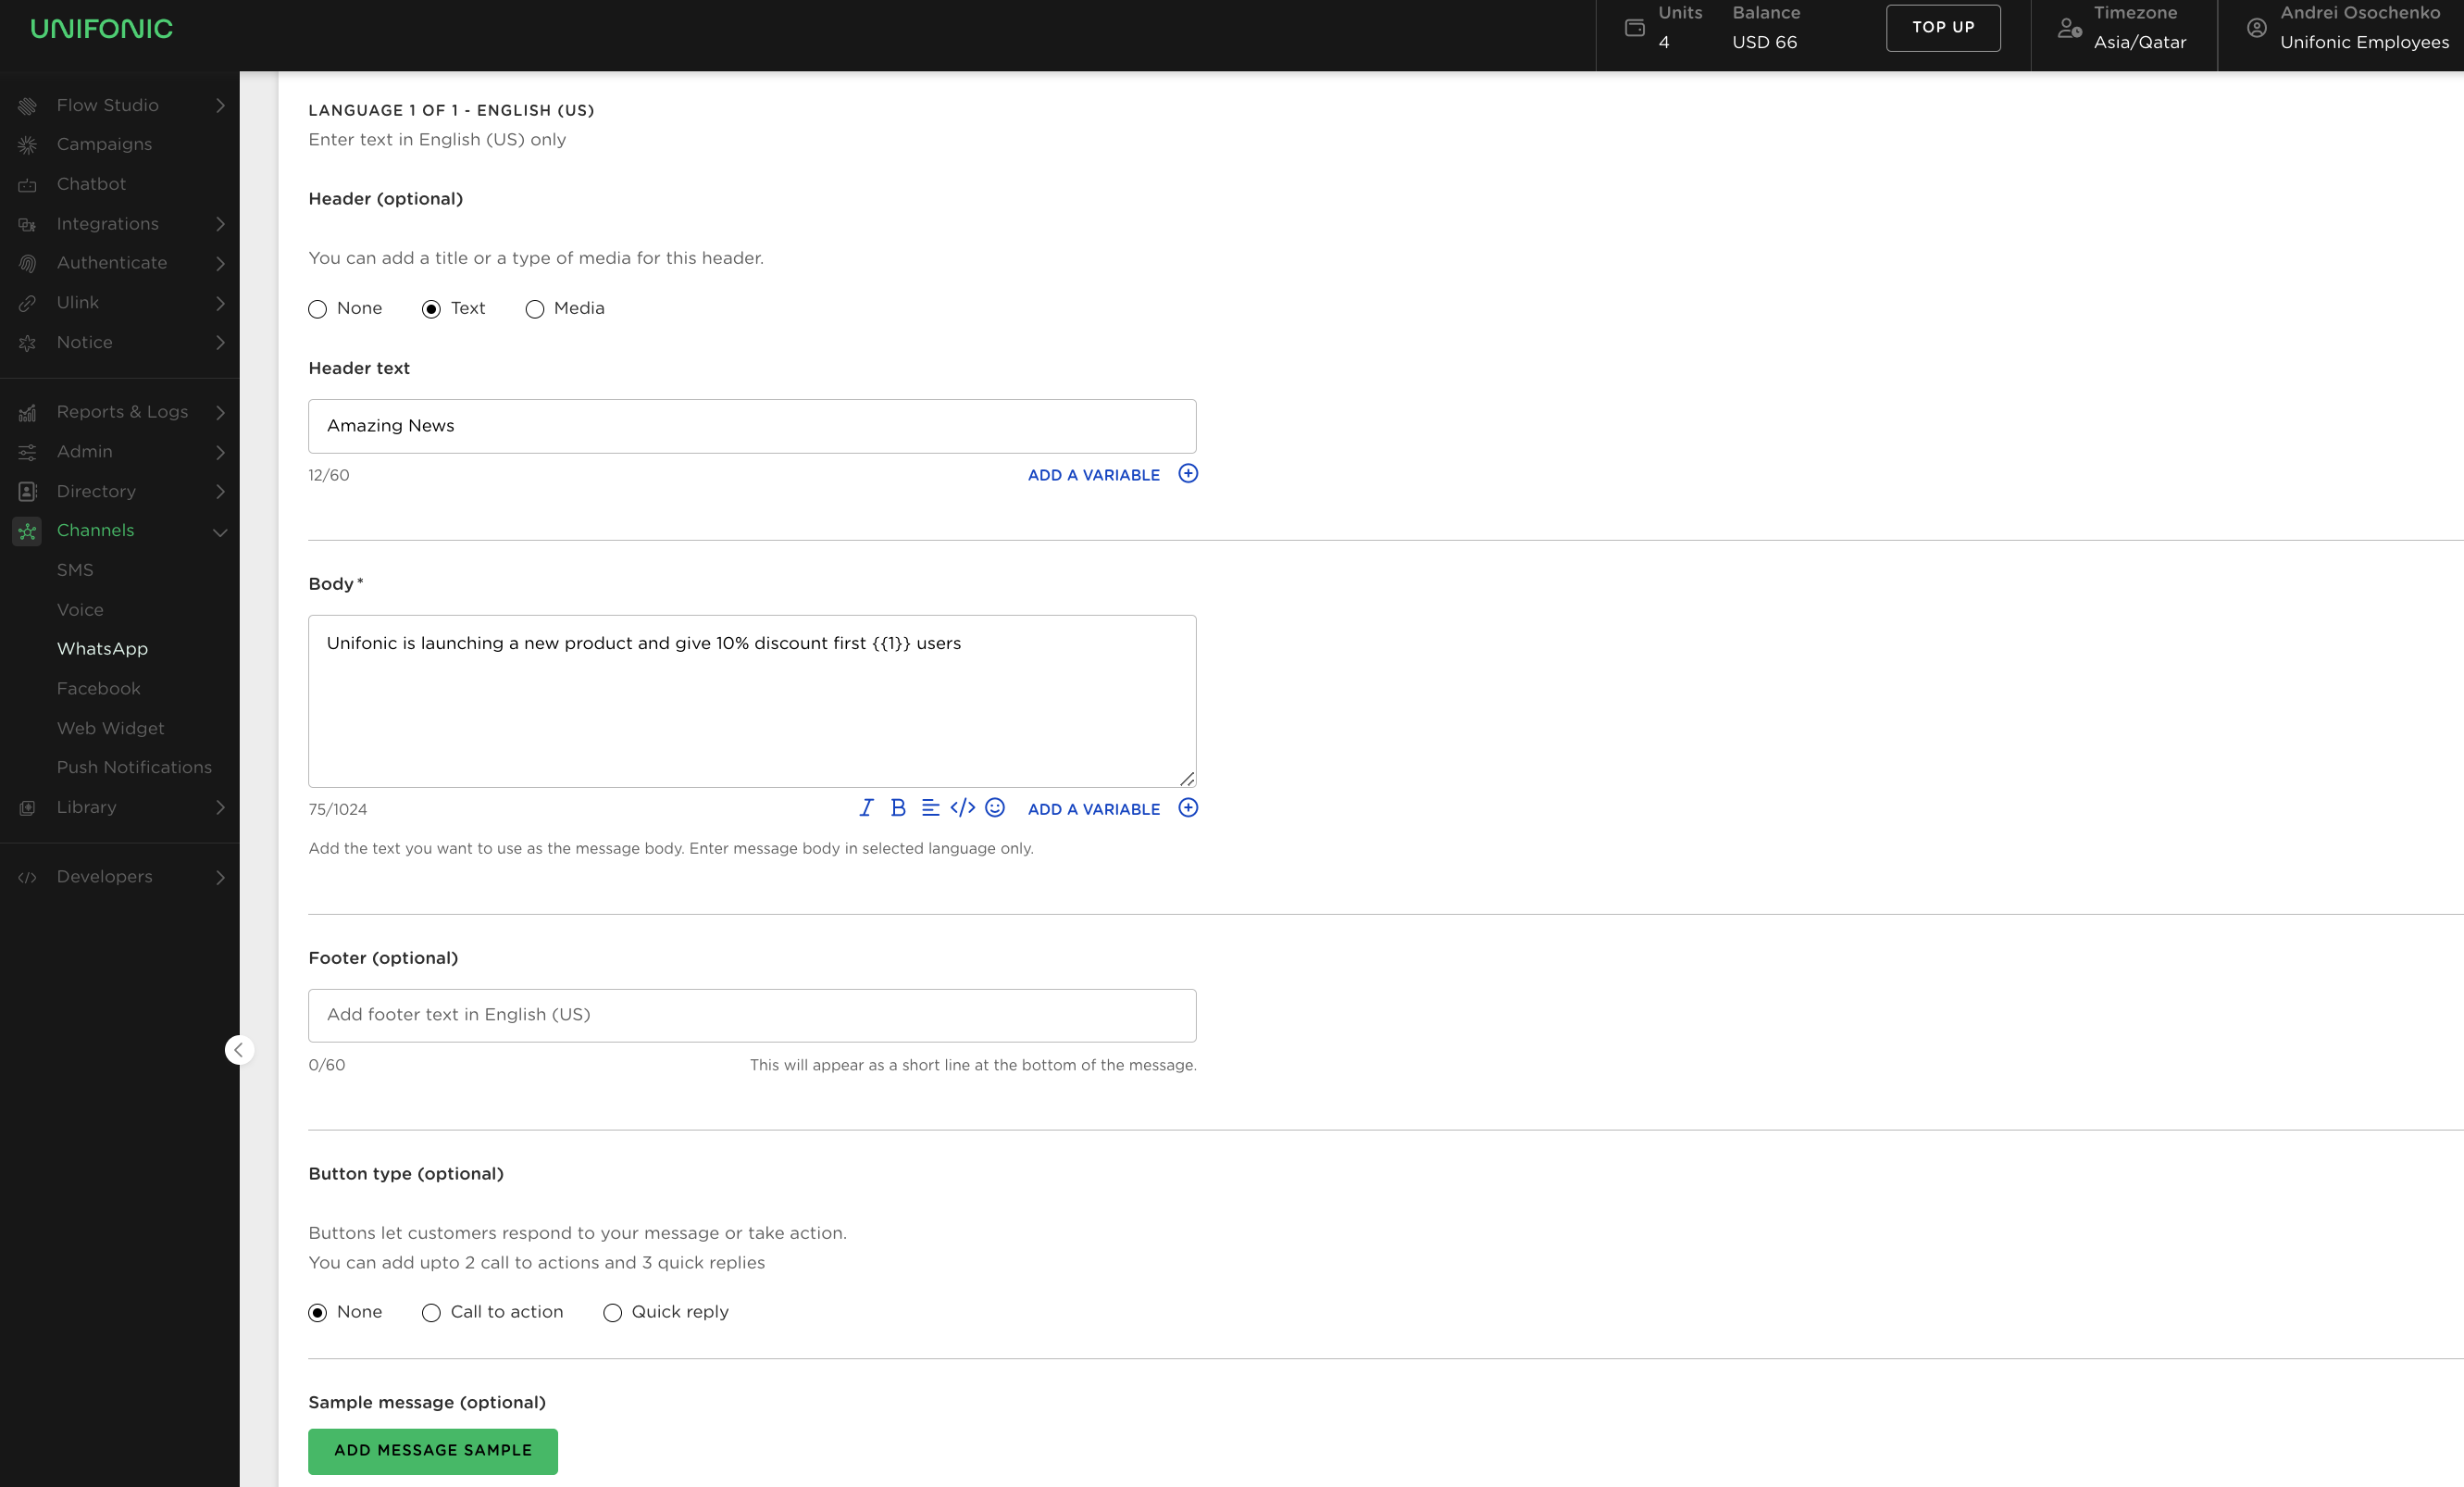
After you filled-in the required info and clicked Next, you would start creating content for the new template.
-
Template Details -> Message Content:
- This is where you specify the general information about the message template you want to create.
-
Language:
- Make sure you are entering text for the language chosen in the previous step.
-
Header (optional):
- None: Select if you do not wish to have a header.
- Text: Choose this option to add a text header.
- Header text: Enter the header for your message here. For example, "Amazing News".
- Media: Select to add a media file as the header.
-
Body:
- Mandatory field: You must enter the main content of your message here.
- Write the message that recipients will see. For instance, “Unifonic is launching a new product and offering a 10% discount for the first {{1}} users.”
- Use variables like
{{1}}to insert dynamic content that will be personalized for each recipient.
-
Footer (optional):
- Use this section if you want to add a short line of text at the bottom of your message.
-
Button type (optional):
- Choose the type of response you wish to prompt from your recipients by adding a response button.
- None: Select if no response is required.
- Call to action: Use this if you want recipients to take a particular action, such as visiting a website or calling a phone number.
- Quick reply: Choose this to allow recipients to respond quickly with pre-defined options.
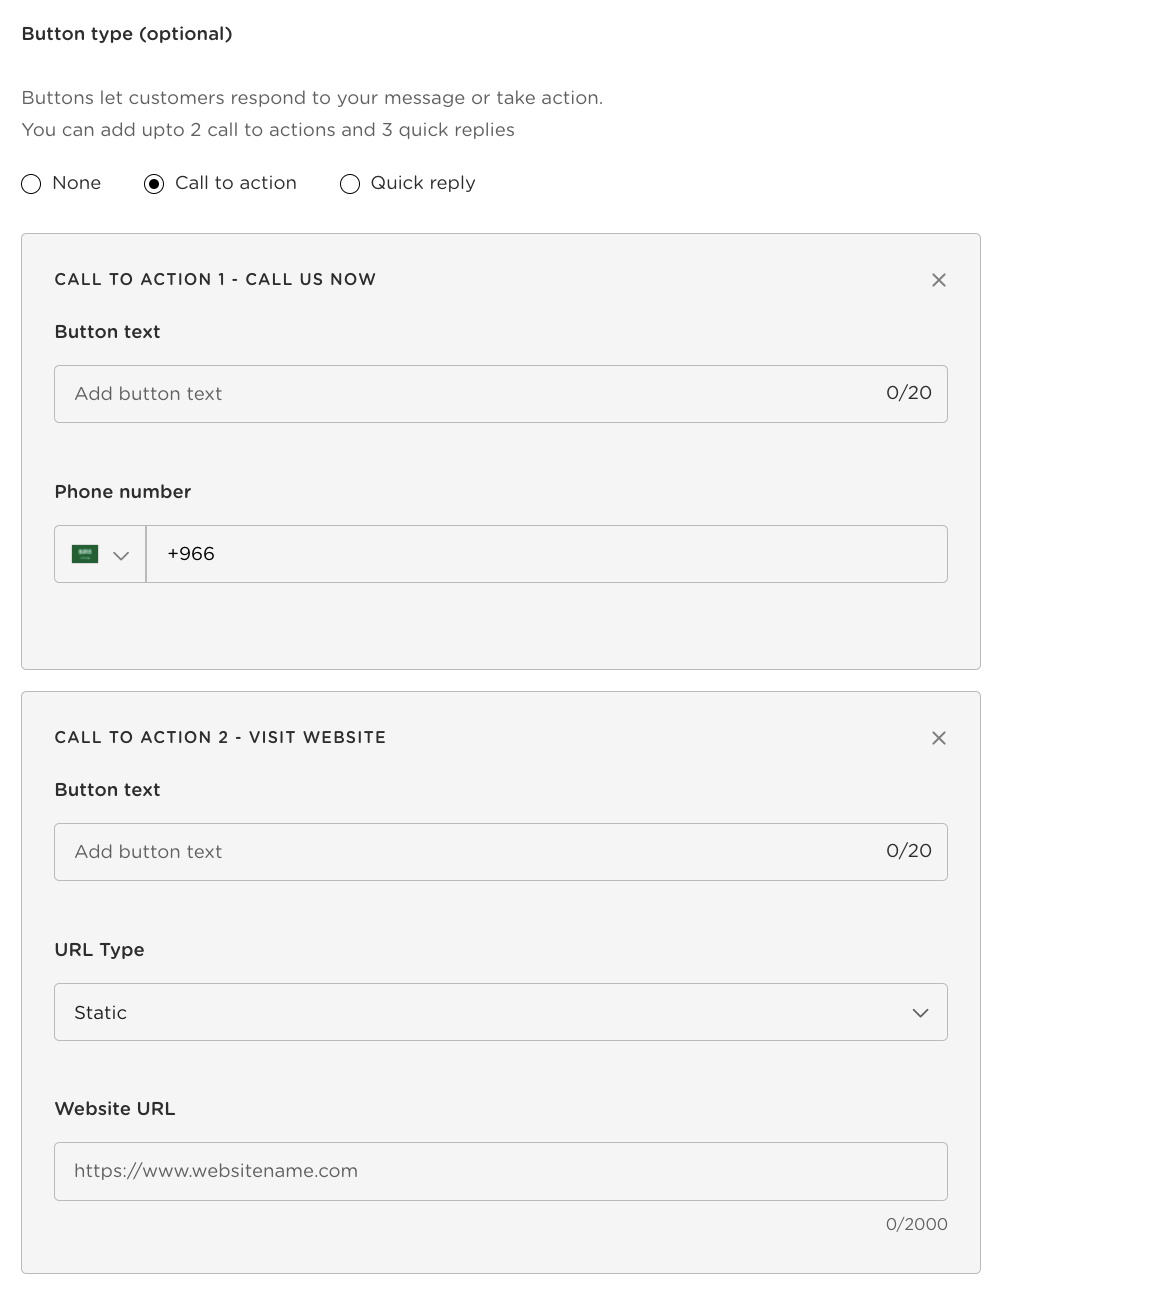
To create a call-to-action button in your message template on the Unifonic platform (screenshot above), follow these steps:
-
Button type:
- Select the "Call to action" radio button to enable customers to perform an action directly from the message.
-
CALL TO ACTION 1 - CALL US NOW:
- Button text: Enter the text that will be displayed on the button, such as "Call Us Now". This text should be a direct call to action to prompt the user to make a phone call.
- Phone number: Input the phone number you want customers to dial when they click the call-to-action button. Include the country code (e.g., +966 for Saudi Arabia) to ensure the number is dialed correctly.
-
CALL TO ACTION 2 - VISIT WEBSITE:
- Button text: Add the text for the second button, for example, "Visit Website". This should encourage users to learn more about your services or products.
- URL Type: Choose whether the URL is "Static" or a "Dynamic" parameter. Static will be a fixed URL which should be enough in most of the cases.
- Website URL: Provide the full URL you wish to direct users to when they click the button (e.g., https://www.yourwebsite.com/special-offer-eid24).
After completing these fields, review your entries to ensure accuracy and clarity in your call-to-action prompts. This will maximize the effectiveness of your customer interactions.
- Sample Message (optional):
- Click "ADD MESSAGE SAMPLE" to provide an example of how the message template will be used. This helps clarify the context of the message.
- Remember to exclude any actual user or customer information from the sample.
Keep in mind that once the template is saved, it can only be edited once every 24 hours.
Once you've completed all the sections, you can save and submit your template for Meta approval.
In addition, templates may be disabled automatically by Meta based on customer feedback and engagement. Once disabled, a template cannot be sent in a template message until its quality rating has improved or it no longer violates Meta business or commerce policies.
Updated 11 days ago