Getting a Sender ID
In this section, we will provide the instructions on how to get your Sender ID
Understanding Number Types
When sending SMS to mobile recipients, companies are offered a wide range of options in terms of how they want their message to appear on the recipient's phone. These options refer to various number types that companies can use to send SMS to recipients.
- Sender ID - also known as Alphanumeric Sender ID or just Sender, is a string of up to 11 alphanumeric characters (e.g., Unifonic) that would entirely replace a phone number. The benefit of using Sender ID is credibility, as your message would appear on the recipient's phone with your brand name.
Note
There is a specific process on the Unifonic side known as registration of the Sender ID that we put in place to confirm the credibility of the Sender ID.
-
A shortcode is usually a 4—to 6-digit phone number designed for high-throughput, two-way messaging. Short codes are used to send and receive SMS messages to and from mobile phones. These numbers are perfect for apps that require a reply from the recipient, like appointment confirmation, interactive surveys, and transactional messaging.
-
A long code is a standard phone number used to send and receive SMS. Your mobile phone number is an example of a long code (which is a 9—or 10-digit number in many countries), so it gets its name from the fact that it is usually longer than a short code.
Configuring a Sender ID
To request a sender ID, send an email to [email protected] or if you already have a Unifonic account, follow the next steps.
-
Login to the Unifonic platform: https://cloud.unifonic.com/
-
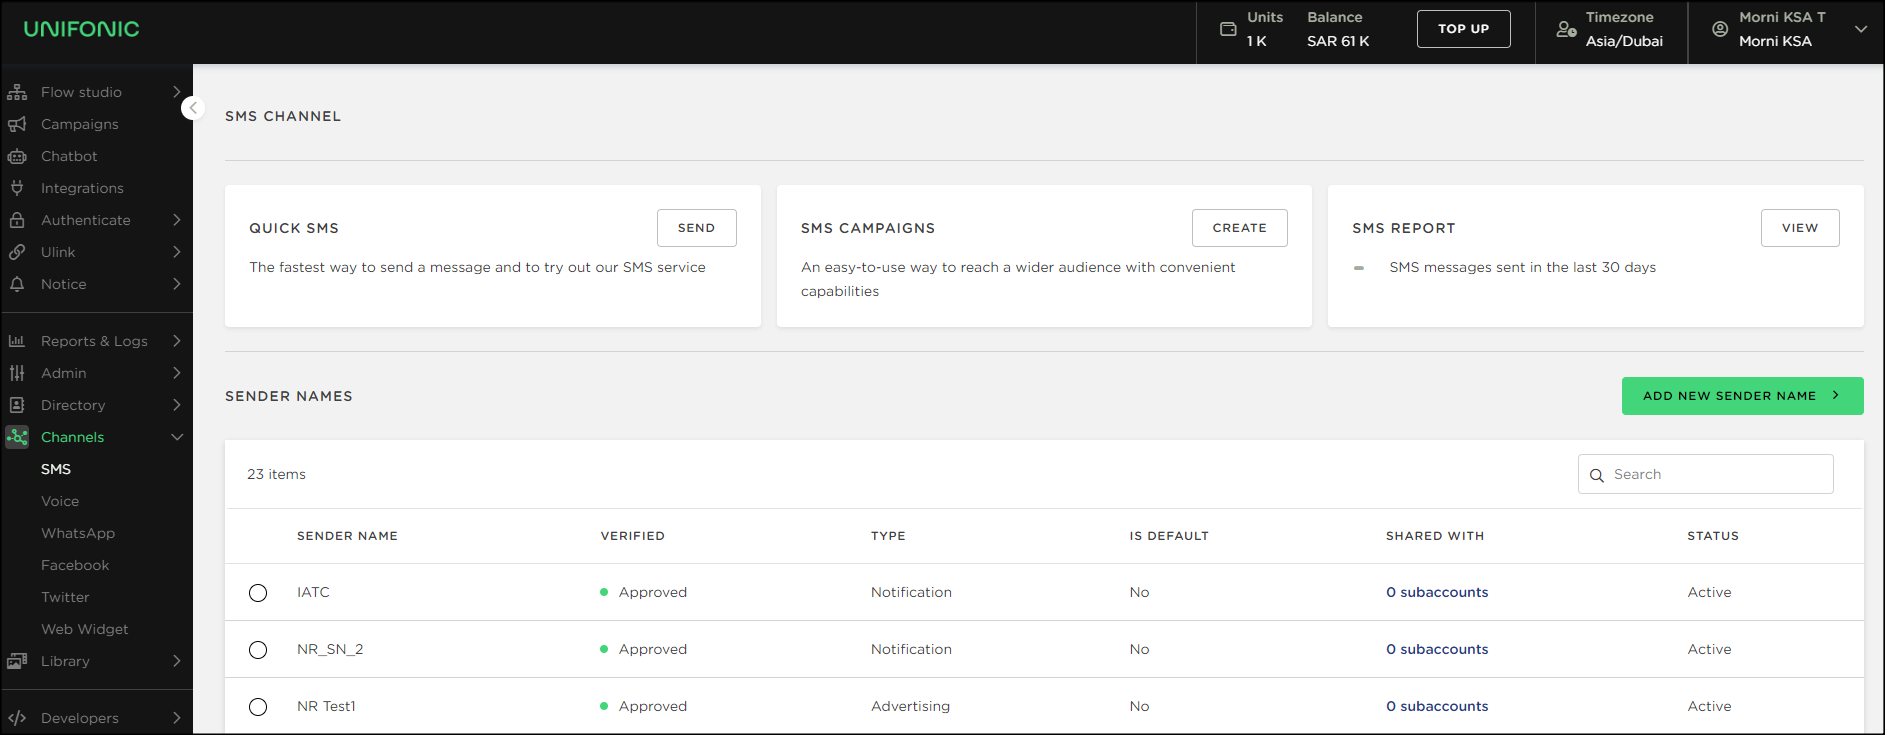
On the left side, from the menu bar, navigate to Channels, then select SMS.

Note:
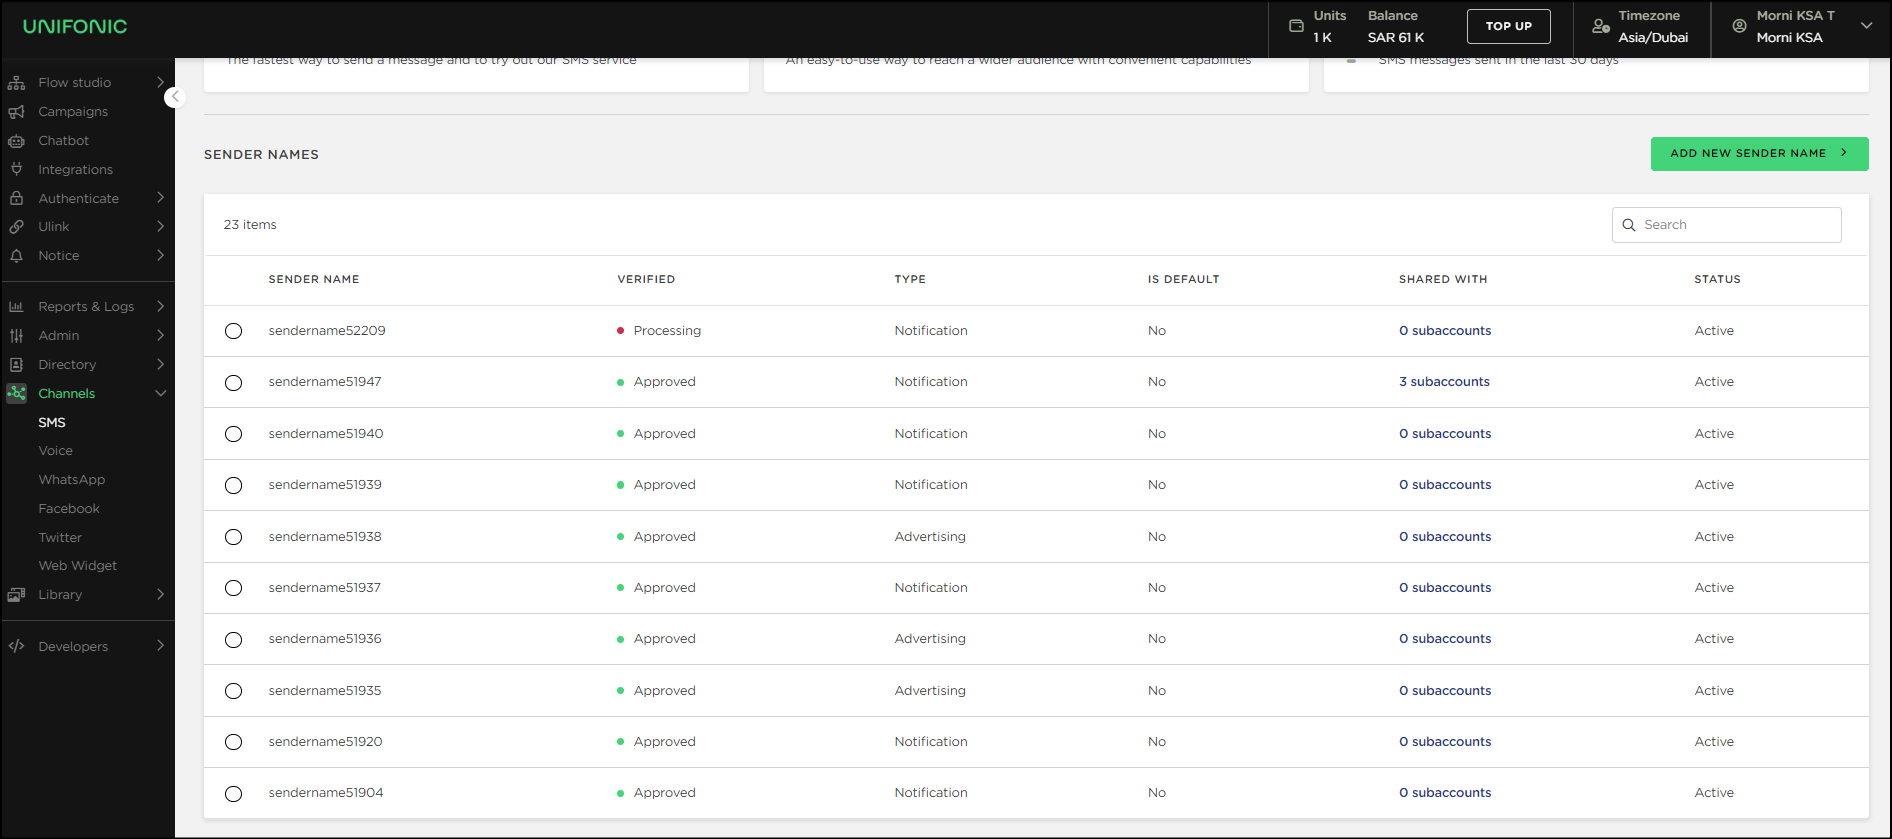
The user is able to select the required sender ID, and either deactivate or share it.
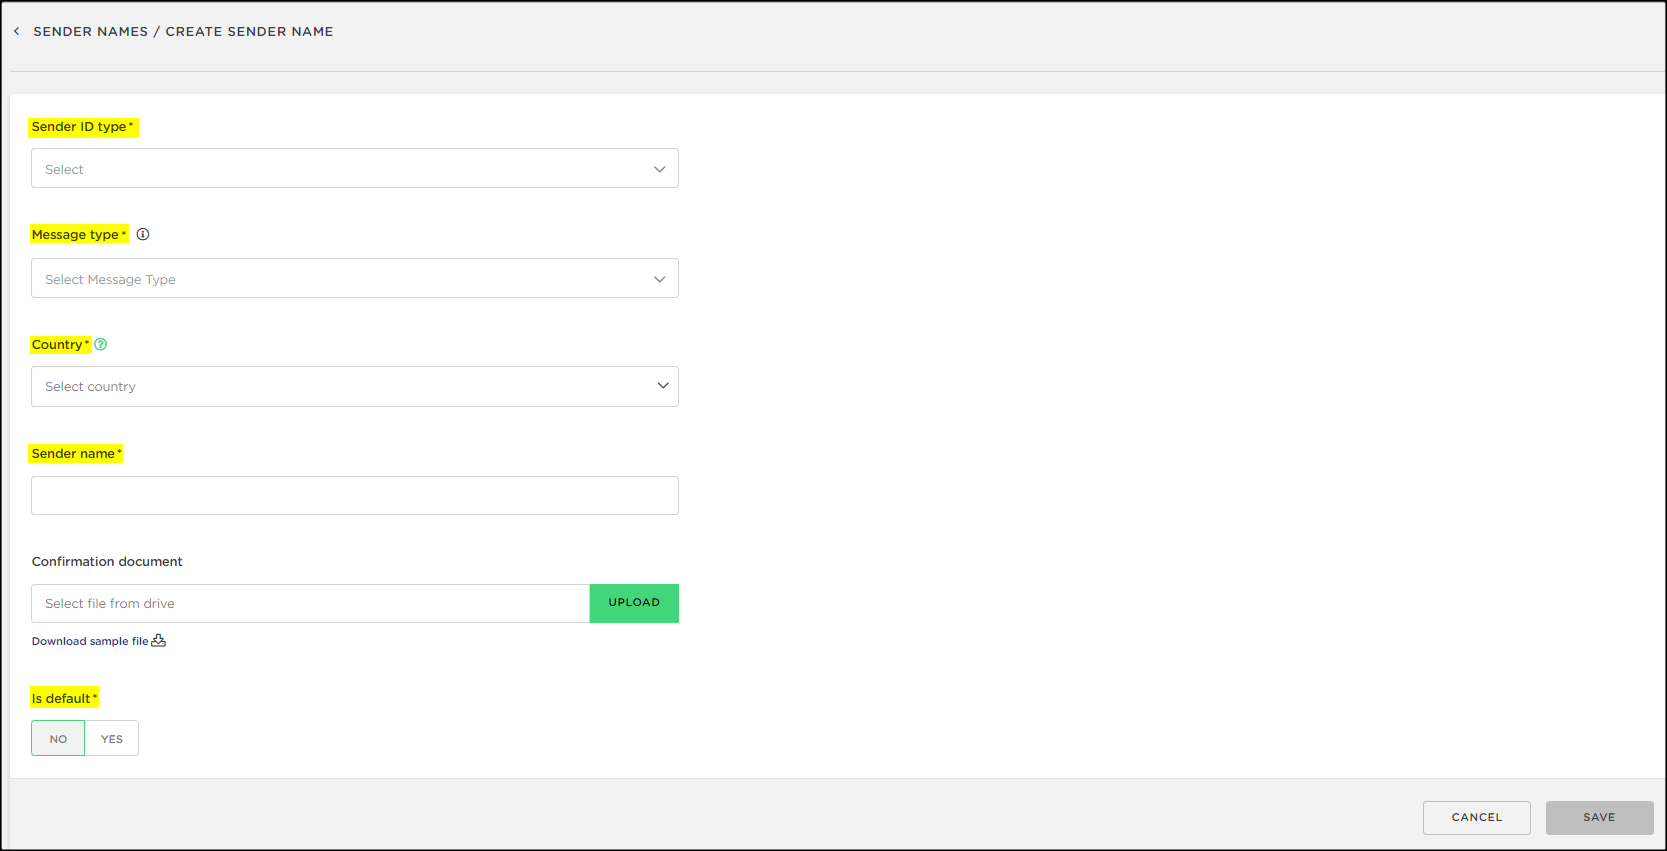
- Click the Add New Sender Name button, where the following screen appears.

- The user has to fill in all required fields to create a new sender ID, by selecting the sender ID type, it can be "Notification" or "Advertising" (The advertising senders typically must include -AD).
- Select the message type: Awareness, Service, or Warning for Notification and Personal or Promotional for Advertising.
- Select the country, type the sender, and upload the confirmation documents.
- Switch between Yes/No if you want to make this sender the default.
- Click Save.
Note
A confirmation email is sent. Your sender will be processed, and if there is any additional requirement from operators, our support team will contact you.
Once the activation process finishes, the sender's status will change to "Approved."

Contact US
If any questions or doubts regarding this process, do not hesitate to get in touch with [email protected]
Updated 11 days ago